
This post details the process to re-install RouterOS on a failed RouterBoard or a RouterBoard that has been overwritten with some other router OS such as OpenWrt.
Mikrotik does a good job of explaining how to install and run NetInstall, but does not mention the importance of:
- Disabling all other Windows network adapters before running netinstall
- Disabling your firewall
This post was inspired by our other posts where we installed OpenWrt on various Mikrotik RouterBoards:
Those OpenWrt installation instructions are careful to explain that you should export your RouterBoard license key before overwriting the RouterOS in the flash of your RouterBoard (see either of the above posts). This post therefore completes the cycle: how to reverse the process by running NetInstall to remove OpenWrt and re-install Mikrotik RouterOS
When I attempted to run netinstall, it would always fail by not showing any RouterBoard devices connected to the network. It took me quite awhile to determine the problem was netinstall's inability to reliably detect which network adapter it should use. If you search 'netinstall failure' you will find many people that describe netinstall failing to detect any devices: it may just be that the extra step of disabling all other network devices, and your firewall, will help in many of those netinstall fail instances.
So this post details the process of running NetInstall with the added suggestions to disable other network adapters and disable your firewall.
Download NetInstall and RouterOS
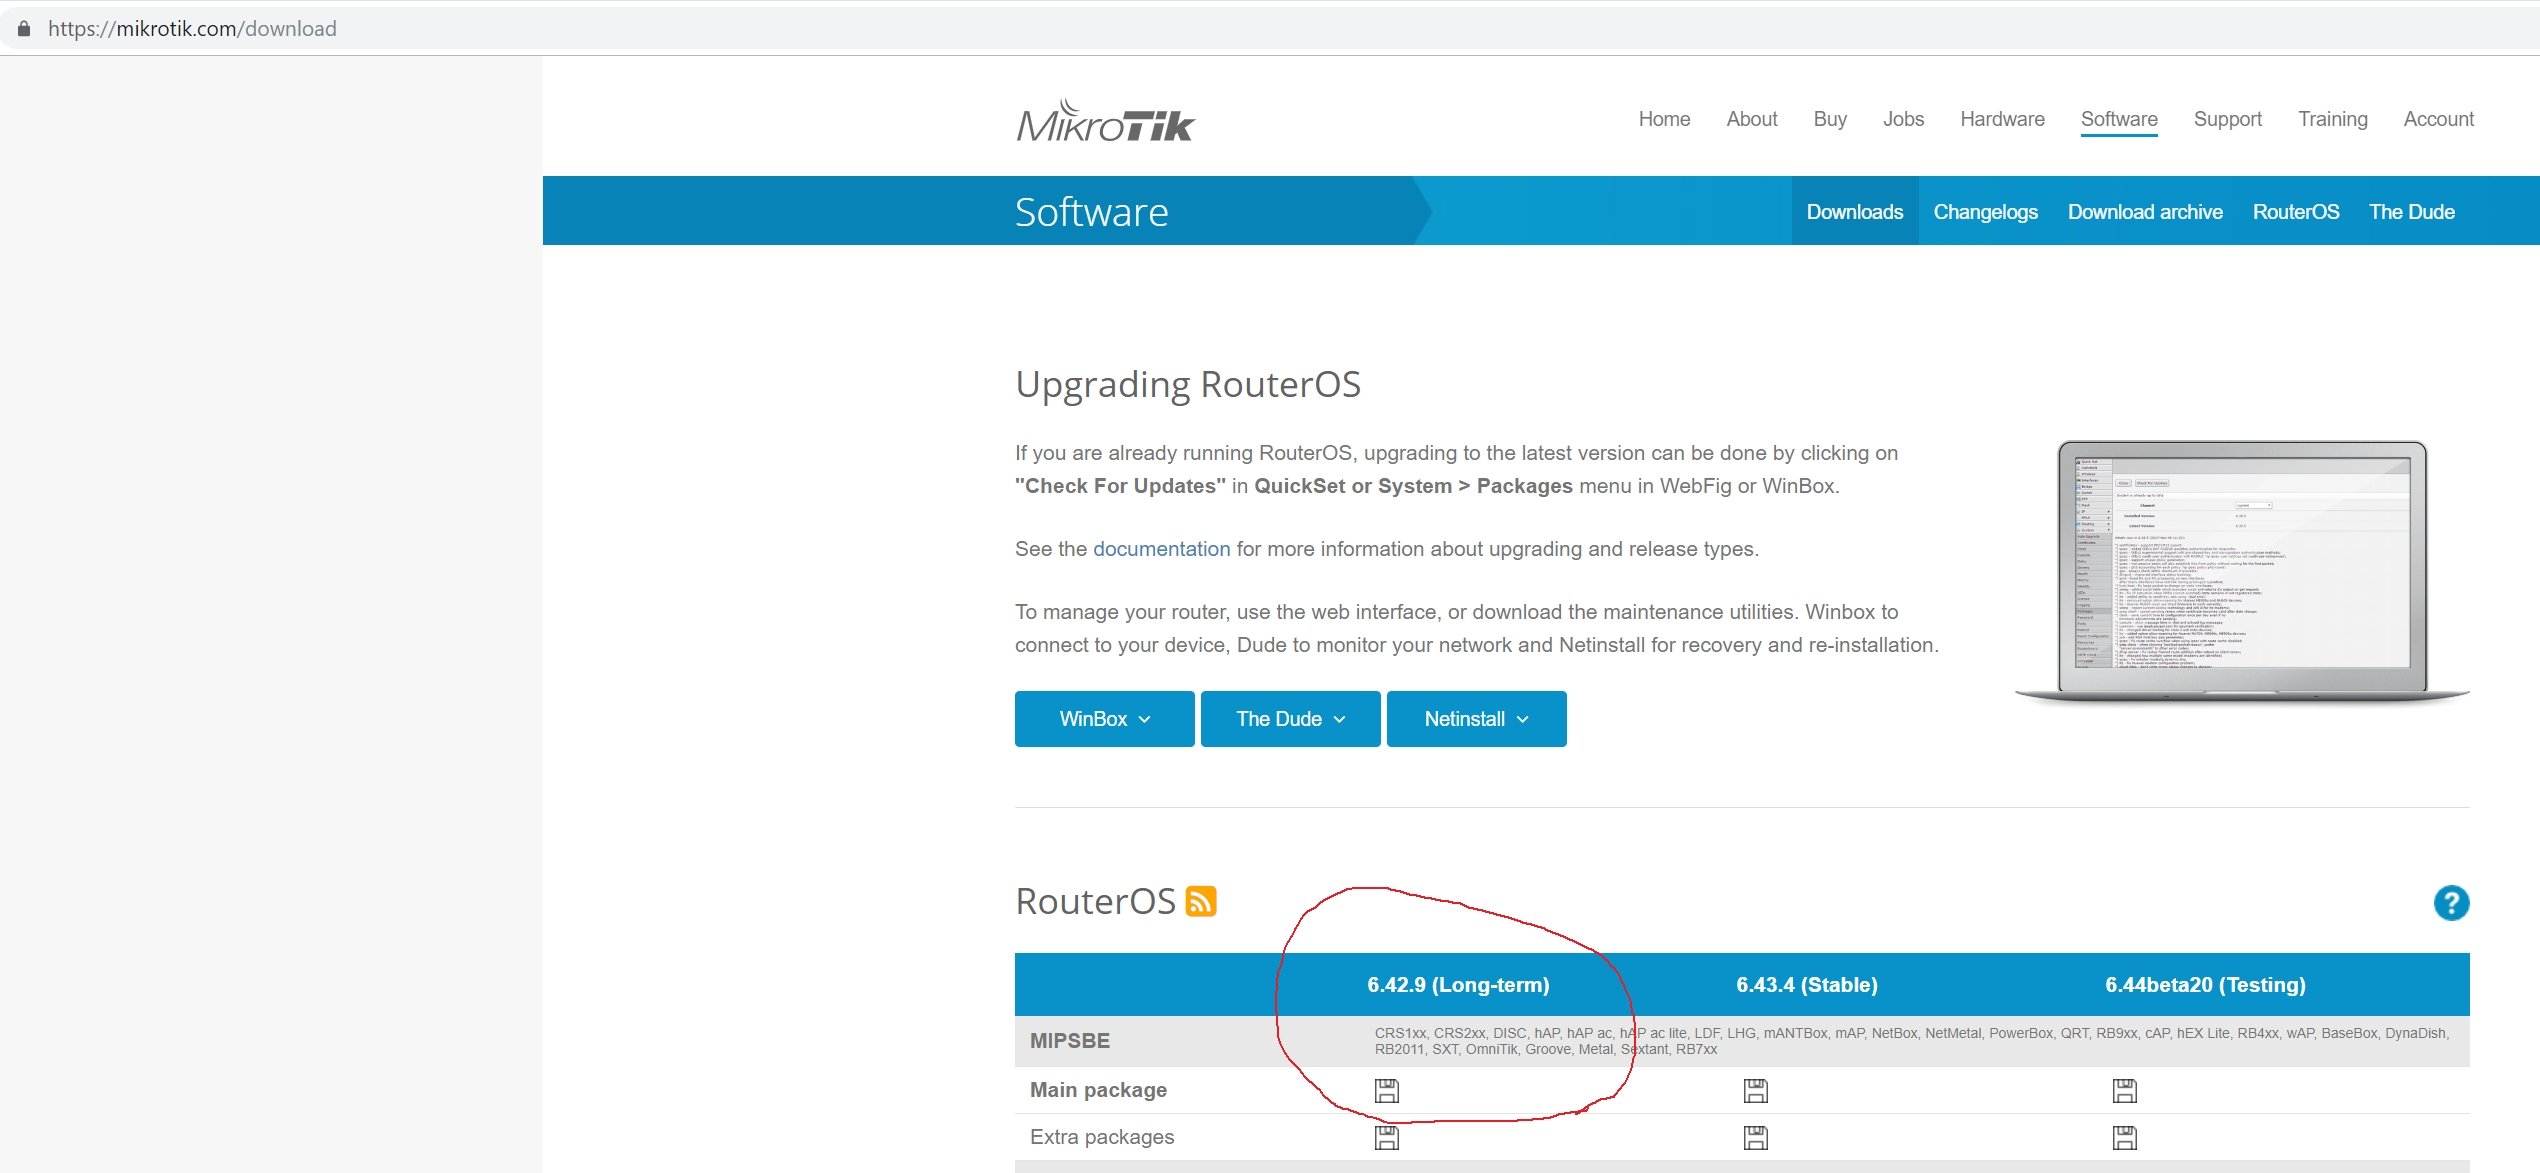
Download a copy of NetInstall and the (latest) RouterOs for your hardware from the Mikrotik website. Make sure you get the same version NetInstall and RouterOS at the same time. If you are getting RouterOS for the RB4XX RouterBoards, they are MIPSBE architecture devices:
Extract the netinstall.zip file into a convenient location such as your Downloads folder.
Disable All Network Connections Except One
Press the Windows key, then the 'R' key to get to Windows network connections:

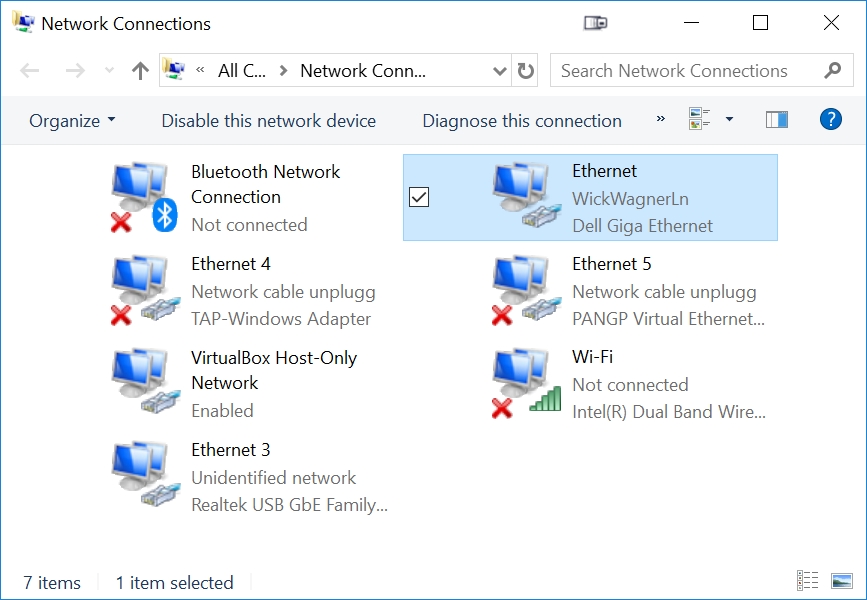
Take a look at ALL your network connections listed. I STRONGLY suggest you disable EVERY network connection other than the one you will be using to connect an Ethernet cable to your Mikrotik RouterBoard. The Mikrotik netinstall program seems to be buggy/random about the network device it selects from this list of Network Connections unless you are careful to only give it the one choice of the network adapter you will be using.
In my case, if the VirtualBox network adapter was enabled, netinstall would never find the booting RouterBoard. Even more peculiar was the strange behavior that once I re-enabled all my network connections after getting netinstall to finally work, netinstall would no longer fail. It seems to 'remember' which network device to use once it successfully uses a device and then continue to work thereafter. Weird.
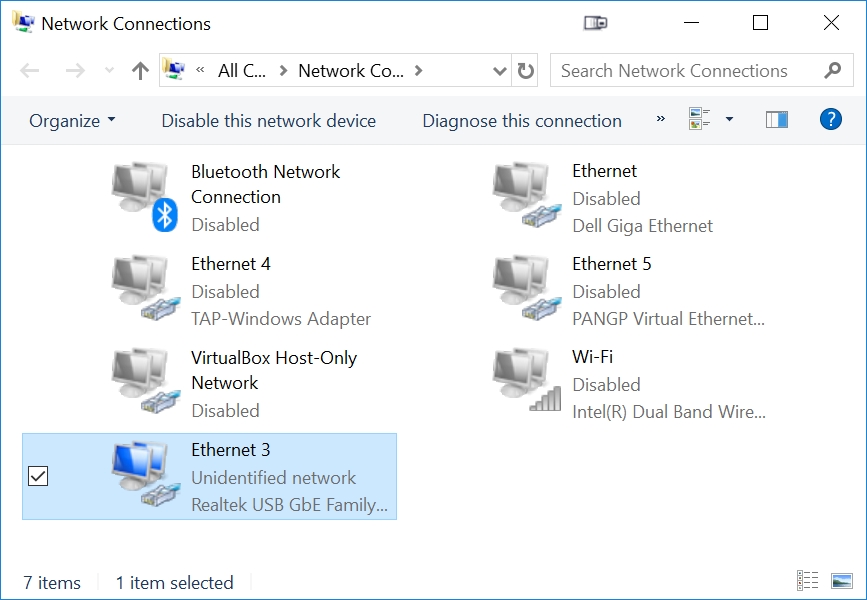
I am using my Windows 'Ethernet 3' USB to Ethernet adapter to plug in to the RouterBoard. So I will disable every other device listed here in Network Connections. Right click each device listed in Network Connections and press 'Disable'. Here is my list of Network Connections after disabling everything but the Ethernet that I will be connecting to the RouterBoard:
Plug Ethernet Cable into Routerboard ETH1 Port
When plugging in to a RouterBoard to NetInstall a copy of RouterOS, you must plug the other end of your Ethernet cable to the ETH1 port of your RouterBoard: ETH1 is typically the WAN port on a RouterBoard.
Setup Your Computer's Ethernet Port with a Static IP Address
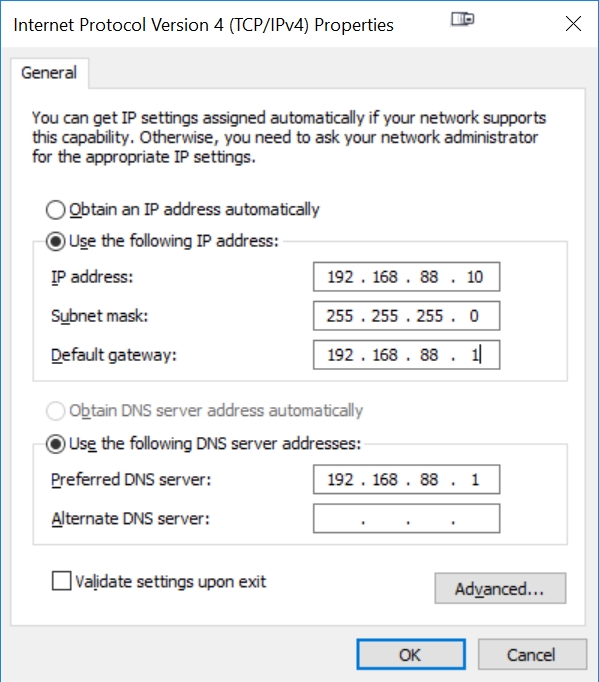
Right Click your Ethernet device in Network Connections (Ethernet 3 in my case), select properties, then click on Internet Protocol Version 4 (TCP/IPv4):

Pick a static, fixed IP address to run your Ethernet, such as:
Start NetInstall
Use Windows Explorer to navigate to the folder where you unzipped netinstall and double click the netinstall.exe file:

Windows and your firewall will likely ask for permissions: be sure to respond yes. You may need to disable your firewall to get netinstall to work.
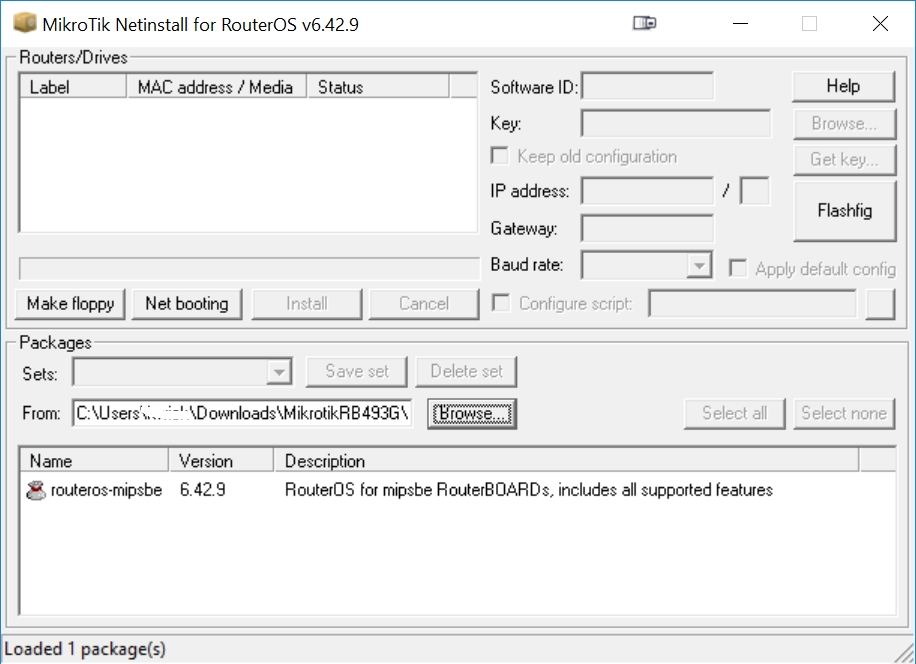
Press the Browse button in netinstall and click on the RouterOS you previously downloaded at the beginning of this procedure:
Power Up the RouterBoard While Pressing the Reset Button
The RouterBoard will attempt a netinstall (netboot) if you press and hold the Reset button on the RouterBoard. It may take 15-20 seconds of holding the Reset button before the RouterBoard attempts a netboot.
Press the Reset button on the RouterBoard, connect the power jack to the RouterBoard, and continue holding the Reset button until netinstall recognizes the RouterBoard. Then click on the detected RouterBoard:
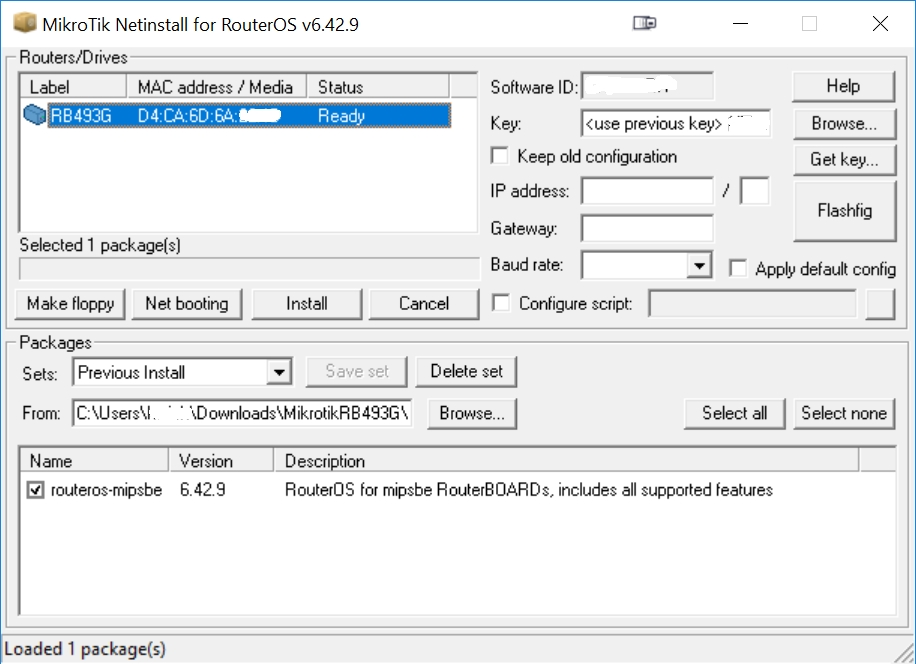
If NetInstall detects your previous key, select the routeros to install and press the Install button. If RouterOS does not detect your key, press the 'Browse' button and navigate to the .key file that you previously saved (using WinBox) or just purchased from Mikrotik.
Press the 'Install' button and wait about a minute for the install to complete. Reboot the RouterBoard and enjoy your new installation of RouterOS!
Don't forget to enable all your Network Connections that you previously disabled and set your Ethernet connection back to DHCP.